Gee I am on fire tonight two posts phew and I am at back at work. I must admit I read challenges and then lay in bed thinking through what image and papers I am going to use that way once I get some time I don't need to sit and think I can just create. I have used a Tilda from the So special collection and she is Tilda with bow. The heart is from a previous collection and this is the first time I have masked an image and I am really pleased with the result. Anyway I am entering this card in the M.D.U.C 'Love'.
I coloured Tilda in using my Copics in the following combinations
Dress, Bow- RV11, R83, R85
Dress & Sleve Trim- E04
Dress Frill- W1
Hair- E41, E53, E57
Socks- W1
Heart Front- RV11
Ribbon- R83, R85
Lace-W1
Skin- E000, E00, E50, R20
I have used 'Kraft' card stock and the DP is Vintage Valentine- Valentine Strips by Fancy Pants Design. Its funny I actually bought this paper to go with my Tilda with the gingerbread but it worked so well with this image.
Monday, February 7, 2011
DCD Christmas Club "The Gift of Love"
Since entering the land of Blog I saw a few posts for Christmas All Year Round Blogs. What a great idea, every year I think I have left enough time to make Christmas cards and then I seem to run out of time. I also love Christmas and really like the idea of having a little bit of the season surrounding me all year. So I am entering this card in the D.C.D (Die Cut Dreams) Christmas Club 'The Gift of Love' Challenge. I coloured this image a while ago and was just waiting for the right challenge. I did write down my Copic colours however I have looked high and low to know avail. I do however know the papers that I used. The Santa paper and the print are both the same piece of paper I just used the reverse. It was part of the new Kaiser Christmas range last year and is part of the 'Tis The Season Collection and is called St. Nick. The card stock was in my scraps box and I have used Kraft coloured card for the background. Having the Kaiser Outlet down the round means that I have loads of their products and I have used their rub-ons for the corners and for the sentiment. I really loved the way that the rub-ons in the corners picked up the swirl that is on the label on the present. Anyway here she is
Saturday, February 5, 2011
Candy at Jane's Lovely Cards
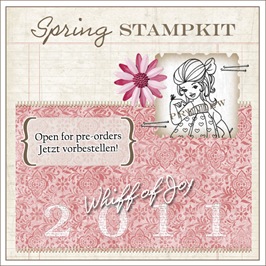
Over at Jane's Lovely Cards she is generously giving us the opportunity to be in the running for some cool Blog Candy which is the new release Spring Stamp Kit from Whiff of Joy, so go check it out and enter.
I am also super excited as I have made a number of new purchases yes my New Years Resolution is GONE. Anyway my new Tilda's from the You are so special collection have arrived and I also ordered a stamp from the states from Penny Black called 'Fly Away' which I can't wait to use. I hope to have a new post by Monday see you then!
Monday, January 31, 2011
Charlston Tilda with love
Well I am back to work tomorrow and wanted to get this card finished and posted before I return to the routine. I love this Tilda and needed some down time the other night so I thought I would just colour. When I looked at her I thought I bet you would love some ruby red dancing shoes and so the shoes inspired Charleston Tilda. It was then when I was looking through my blog challenge calendar. Yes I know its tragic but I have a calendar to keep track of all the blogs I am following and gee is it making my life easier. The following card I am entering in a number of challenges
Just Magnolia- Going Dotty
Magnolia Down Under Challenge- Embossing (Dry)
Totally Tilda- With lots of hearts
Die Cut Dreams- Lots of hearts but No sentiment
Magnolia Stamp Lovers- Glitter
Well here she is....
I have coloured her in with Copic markers in the following combinations
Skin- E000, E50, R20
Dress- R22, R27, R59
Rose- R20, G24
Hair- C1, C7, 100
Shoes- R27
I used the following paper, the red with white spot paper is from Kaiser 'Fun Fair Trapeze'. I also used red and whit card stock from my stash. I cut the dot paper out with my Cricut using the Accent Essentials cartridge using the blacked out scallop frame. I also used the same cartridge to cut the hearts which vary in size from 2 1/2 to 3 inches. After I cut the hearts out I ran them through my Cuttlebug using the swiss dots and divine swirls folders. I then used Stickles- Candy Cane for Tilda's shoes, rose and the large background heart, I also used Rock Candy on her wings. I then used left over commas and question marks from a pack of Thickers as accents on the page and the red hearts were brads I had in my stash.
Here is the card on the inside and I will also include some close ups of Tilda. I reversed the paper order but kept the same shapes and I am really pleased with the contrast. Until next time.....
Just Magnolia- Going Dotty
Magnolia Down Under Challenge- Embossing (Dry)
Totally Tilda- With lots of hearts
Die Cut Dreams- Lots of hearts but No sentiment
Magnolia Stamp Lovers- Glitter
Well here she is....
I have coloured her in with Copic markers in the following combinations
Skin- E000, E50, R20
Dress- R22, R27, R59
Rose- R20, G24
Hair- C1, C7, 100
Shoes- R27
I used the following paper, the red with white spot paper is from Kaiser 'Fun Fair Trapeze'. I also used red and whit card stock from my stash. I cut the dot paper out with my Cricut using the Accent Essentials cartridge using the blacked out scallop frame. I also used the same cartridge to cut the hearts which vary in size from 2 1/2 to 3 inches. After I cut the hearts out I ran them through my Cuttlebug using the swiss dots and divine swirls folders. I then used Stickles- Candy Cane for Tilda's shoes, rose and the large background heart, I also used Rock Candy on her wings. I then used left over commas and question marks from a pack of Thickers as accents on the page and the red hearts were brads I had in my stash.
Here is the card on the inside and I will also include some close ups of Tilda. I reversed the paper order but kept the same shapes and I am really pleased with the contrast. Until next time.....
Friday, January 21, 2011
Colouring Red Tilda
Hi everyone thank you to my new follower Yone I am so excited to have you on board :-) I have a card for you today. My dear friend Alethea came down to craft on Monday night and I coloured Tilda in then. I am really pleased how she turned out considering I coloured her at night without my Ott- Lite. I am amazed at the difference this light makes at night time. I received it as a free gift when I got my new sewing machine. Well here she is
I am entering her in the Make It Colourful Challenge which is Colour It Red I have used the following Copics on Tilda
Hair- 100, C1, C7
Skin-E000, E00, E50
Umbrella-Paper Pieced
Coat- R22, R27, R59
Dress- R20, R22, R27
Thongs- C1, C7
Socks- C1
Branck- E25
White Sigma Pen for blossoms and lace
I used black, white and red cardstock and Kaiser Paper 'Sakura Park'. I then cut the swirl using the Cricut Cartridge 'Serenade' and then I stamped the white swirl using the Kaiser stamp 'Oriental'. I have mounted Tilda on black cardstock that I embossed using the 'Divine Swirl' plate. I am so pleased with my red colouring here is a close up.
I am entering her in the Make It Colourful Challenge which is Colour It Red I have used the following Copics on Tilda
Hair- 100, C1, C7
Skin-E000, E00, E50
Umbrella-Paper Pieced
Coat- R22, R27, R59
Dress- R20, R22, R27
Thongs- C1, C7
Socks- C1
Branck- E25
White Sigma Pen for blossoms and lace
I used black, white and red cardstock and Kaiser Paper 'Sakura Park'. I then cut the swirl using the Cricut Cartridge 'Serenade' and then I stamped the white swirl using the Kaiser stamp 'Oriental'. I have mounted Tilda on black cardstock that I embossed using the 'Divine Swirl' plate. I am so pleased with my red colouring here is a close up.
Tuesday, January 11, 2011
Magnolia-licious Challenge Orange and Green
Well I have made another one and this time it is for the Magnolia-licious Challenge and is inspired by the colours Orange and Green.

These colours remind me of my friend Alethea who was crazy about this colour combo in the early 90's, she even had a jumper knitted in orange and green stripes. Anyway here is my take on the colour scheme and Leath this ones for you.
I used Chinese Tilda and used my Copics in the following colours,
Skin-E00, E20, E50
Hair- 100, C1, C7
Socks- C1, W1
Umbrella- E37, YR00, YR04, YR07
Dress-E11, YR00, YR04
Coat- G00, G07, YG11, YG41
I used the Stampin' Up papers called 'Haiku' for the different layers. Behind the orange is a Kaiser stamp and I used a Fiskars Punch along the edge. Behind Tilda I used a Stampin Up stamp from the 'Eastern Blooms' Set I love the way it compliments the cherry blossoms on her dress. Then I finished it off with Platnium Stickles. Here is a close up of the colouring.

These colours remind me of my friend Alethea who was crazy about this colour combo in the early 90's, she even had a jumper knitted in orange and green stripes. Anyway here is my take on the colour scheme and Leath this ones for you.
I used Chinese Tilda and used my Copics in the following colours,
Skin-E00, E20, E50
Hair- 100, C1, C7
Socks- C1, W1
Umbrella- E37, YR00, YR04, YR07
Dress-E11, YR00, YR04
Coat- G00, G07, YG11, YG41
I used the Stampin' Up papers called 'Haiku' for the different layers. Behind the orange is a Kaiser stamp and I used a Fiskars Punch along the edge. Behind Tilda I used a Stampin Up stamp from the 'Eastern Blooms' Set I love the way it compliments the cherry blossoms on her dress. Then I finished it off with Platnium Stickles. Here is a close up of the colouring.
Monday, January 10, 2011
Tilda with Fir Tree
Well I have certainly got my creative mojo back. The ideas are swirling and seeing I am on holidays I have more time and energy to create. I have made another Tilda card and I am entering her into two challenges. The first is MDUC using a sketch and the other challenge is with Make It Colourful this is their very first challenge and I have chosen to use cool colours. I just got the Tilda with Fir (I ordered her with my Christmas money and thought that this challenge would be perfect for her. I adore snowflakes, snowmen anything to do with snow which is quite funny considering I have never been to the snow. Anyway I used two shades of blue cardstock from my scraps. I then embossed the bling bazzil with my snowflakes cuttlebug folder. I then cut my white piece of bazzill and used my trusty fiskars cutter with the oval template edge to make the scallops. I used a Carl snowflake punch to make three snow flakes and covered them in Kindy Glitz then added Kaiser Rhinestones. I don't know who made the paper doily and the swirly sentiment was a stamp from a Stamp-It christmas set. The ribbon was from my stash and of course I coloured her with Copics. Well here she is
I am really pleased how she turned out. I also discovered that my iphone takes fantastic photos of my card and the colouring looks more reaslistic than it does on my digital camera. Anyway here is the color list.
Fir Tree- G12, G24, B43
Hat & Coat- B21, B23, B24
Fur Trim- C1
Boots- C1, C5
Skin- E000, E00, E50
Hair-E41, E43
Thanks for stopping by.
I am really pleased how she turned out. I also discovered that my iphone takes fantastic photos of my card and the colouring looks more reaslistic than it does on my digital camera. Anyway here is the color list.
Fir Tree- G12, G24, B43
Hat & Coat- B21, B23, B24
Fur Trim- C1
Boots- C1, C5
Skin- E000, E00, E50
Hair-E41, E43
Thanks for stopping by.
Subscribe to:
Posts (Atom)